Yoga is a popular way to exercise both the mind and body. There are many exercises you can incorporate into your routine if you want to focus on specific areas of your body. Here, we will discuss some of the top yoga exercises recommended by an instructor for achieving lean arms.
Yoga can be beneficial whether you are aiming to reduce arm jiggle or build strong biceps. According to Emily Forte, an E-RYT 500 instructor and corporate trainer at YogaSix, many yoga poses involve isometric holds, which means holding a position without movement under tension for a few breaths. Isometric resistance helps activate muscles and maintain muscle length, leading to improved muscle tone and definition, particularly in the arms. Since yoga poses often require supporting your body weight, you effectively work your arms by loading them with your own weight.
If your goal is to strengthen and tone your triceps, deltoids, biceps, shoulders, and upper back, incorporating these 10 yoga exercises into your routine can be very beneficial. You can even combine these exercises to create a short yoga sequence specifically targeting your arms.
Downward-Facing Dog (Adho Mukha Svanasana)
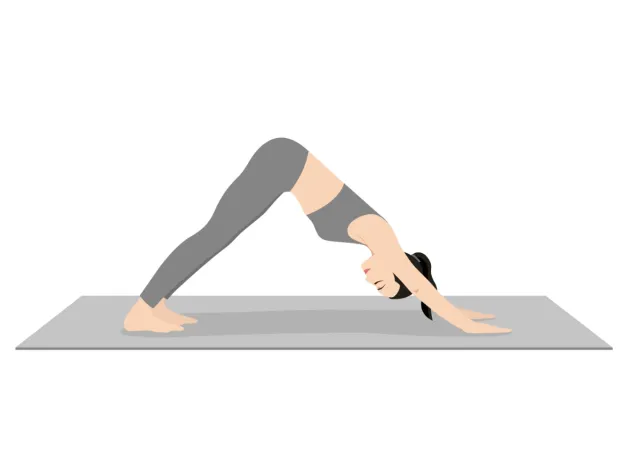
“Downward-facing dog is a great pose to start with to stretch and strengthen your biceps, triceps, deltoids, and shoulders,” Forte says.
Begin on your hands and knees. Raise your hips toward the ceiling. Press your shoulders away from your ears and your heels as close to the floor as possible. Keep your palms grounded on the yoga mat and use your energy to press them toward each other. “Think about making an upside-down V-shape with your body,” Forte instructs.
Hold your downward dog for five to eight breaths.
High Plank or High Pushup (Phalakasana or Dandasana)
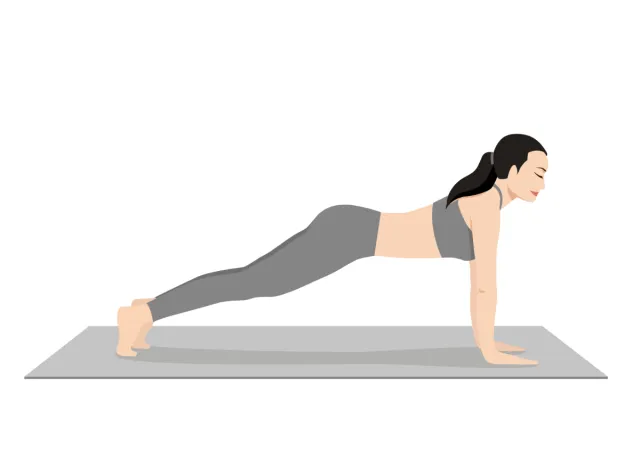
Performing a plank is an excellent total-body workout. “While your legs, core, and back body are all working to hold you in the position, your arms are also in overdrive! Plank is great for biceps, triceps, deltoids, and shoulder strength,” Forte explains.
From a downward dog position, bring your upper body forward so that your body forms a straight line. Align your shoulders over your wrists. Bring your belly button inward as you activate your core and elongate your spine.
Hold this position for three to four breaths.
For a dynamic movement, consider raising your hips toward the sky on every exhale. As you inhale, gradually return to a high plank. Do this three to five times.
Yoga Pushup or Low Pushup (Chaturanga Dandasana)
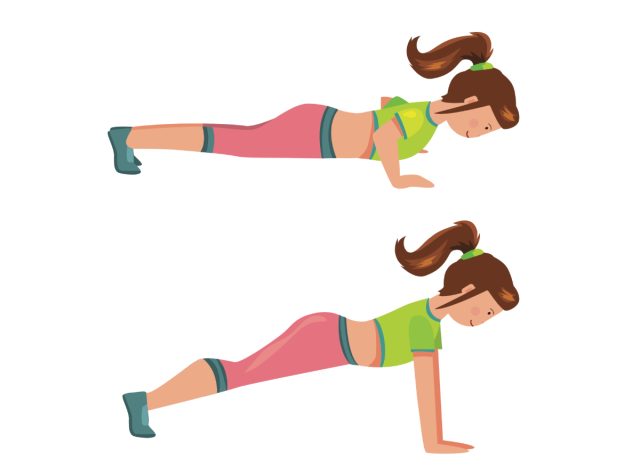
“Similar to a plank, and starting in a plank, a yoga pushup is a full-body movement, with a large focus on the arms and shoulder muscles,” Forte tells us.
Begin in downward dog, and move your body forward to assume a high plank. Keep your core engaged. As you shift your weight forward, bend both elbows and lower your torso toward the ground. Hover just above your yoga mat. Make sure your thighs and core stay activated.
Hold your position at the bottom of the movement for three to four breaths.
For an extra challenge, breathe in, assume a high plank, breathe out, and lower into a yoga pushup three to four times. “To come out of the pose, straighten your arms and lift back up to plank, and then to downward-facing dog, or move through cobra or upward-facing dog (below), to downward-facing dog,” Forte instructs.
Cobra Pose (Bhujangasana)
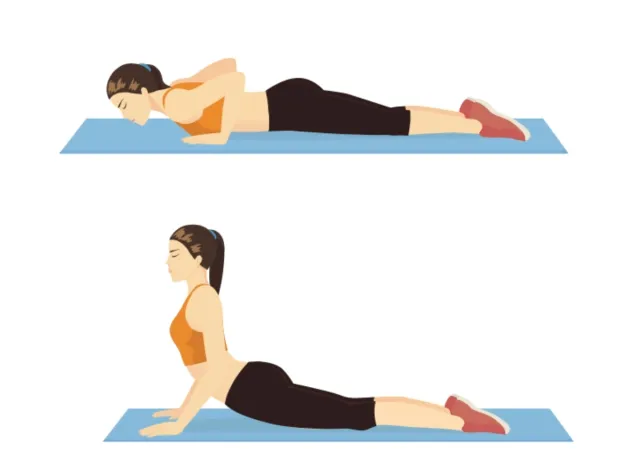
Begin with a yoga pushup. Lower your body to the ground, and bring your hands below your elbows. Press your palms into the mat as your chest comes away from it. Shift your gaze toward the front of your mat. Lower back to the ground or lift into upward-facing dog.
Hold for three to four breaths.
Side Plank (Vasisthasana)
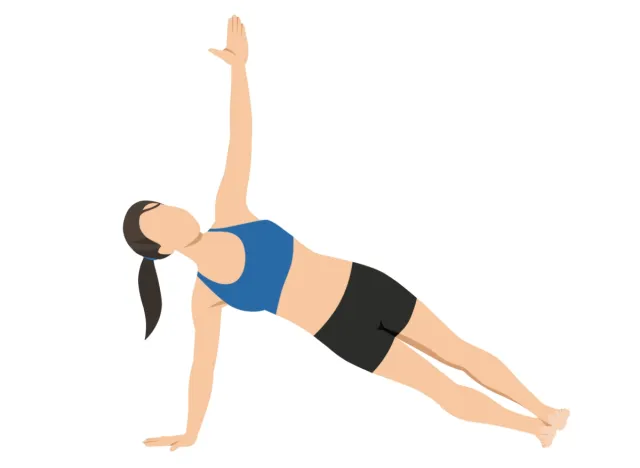
“Just like high plank, side plank requires your arms to hold your body weight, except one arm does all the work,” Forte explains.
From a downward dog position, roll into a high plank with your hands under your shoulders and your body forming a straight line. Shift your body weight to your right side, keeping your right palm grounded and raising your left arm to the sky. Use the resistance below your right hand to open your chest.
Hold for five to eight breaths.
Forearm Plank or Dolphin Plank (Makara Adho Mukha Svanasana)
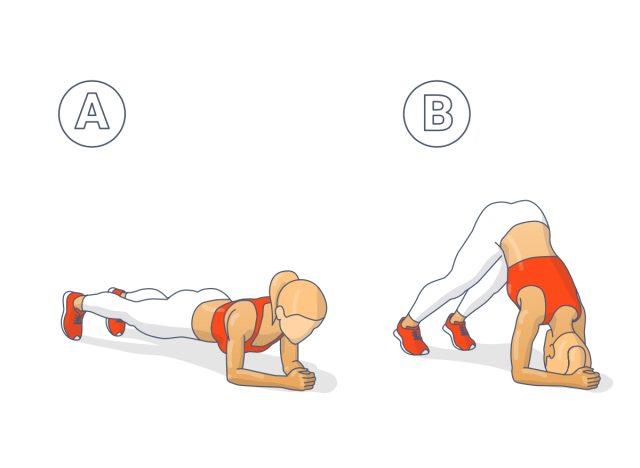
Begin in a high plank. Lower one forearm at a time to the mat. Your elbows should be stacked below your shoulders. For additional support, feel free to interlace your fingers. Engage your core and lengthen your spine.
Hold the pose for five to eight breaths.
“For an added challenge, plant your right palm and then left and lift back up to high plank. Move from high plank to dolphin plank five to eight times. Lift to high plank to come out of the pose, and lower to the mat for locust pose (below),” Forte instructs.
Locust Pose (Salabhasana)
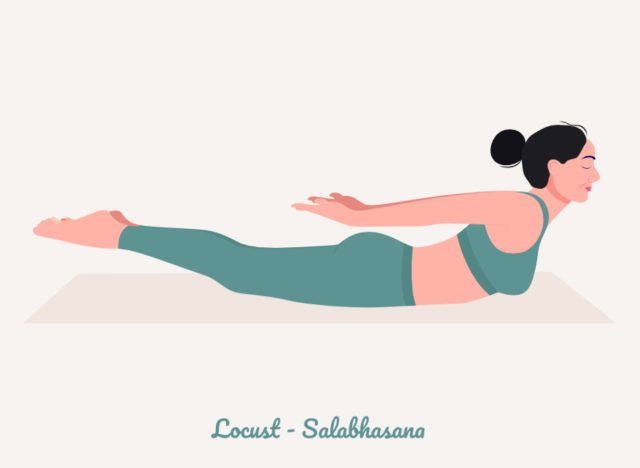
Begin locust pose on your stomach with your arms at your sides. Place your forehead on the floor, and make sure your feet are hip-width apart. Evenly ground through the top of each foot. Breathe in, and lift your chest and forehead off the ground. Hover your legs and hands above the mat, and interlace your fingers together over your lower back or tailbone. Bring your body weight to the front of your pelvis.
Hold for three to four breaths, working your way up to five to eight breaths.
Reverse Plank (Purvottanasana)
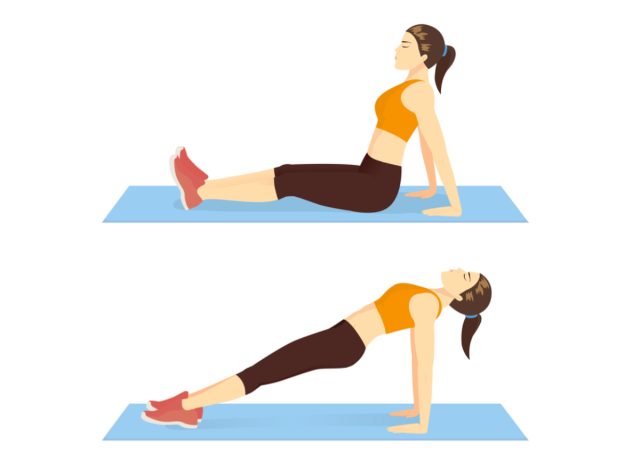
“Reverse plank recruits bicep and tricep strength while strengthening the shoulders,” Forte explains.
From locust pose, assume a tabletop position. Then, spin around to a seated position so your legs are extended ahead of you. Plant your hands behind your hips and shoulders, pointing your fingers forward. Press through your palms as you lift your pelvis toward the sky and roll onto the soles of both feet.
“Send your tailbone toward your heels and create a slight arch in your upper back,” Forte instructs. “Hug your shoulder blades together, spin your elbow creases back, and open through your chest.”
Hold the pose for five to eight breaths.
Fallen Triangle (Patita Tarasana)
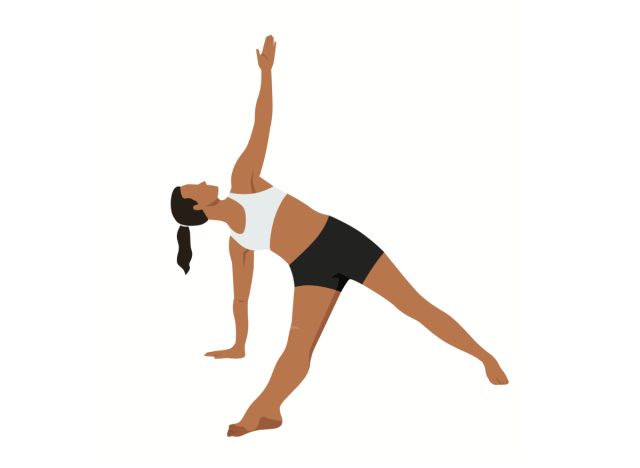
“Fallen triangle is another pose that demands engagement in your arms and shoulders to hold the pose,” Forte explains.
Begin in downward dog. Breathe in and raise your right leg as high as you can. Exhale, bring your weight forward as you almost assume a high plank, and bring your right knee to meet your left elbow or tricep. Plant your right foot just beyond your left wrist. Maintain an activated core. Shift your weight into your right hand, and raise your left arm up to the sky.
Hold for three to five breaths.
Crow (Bakasana)
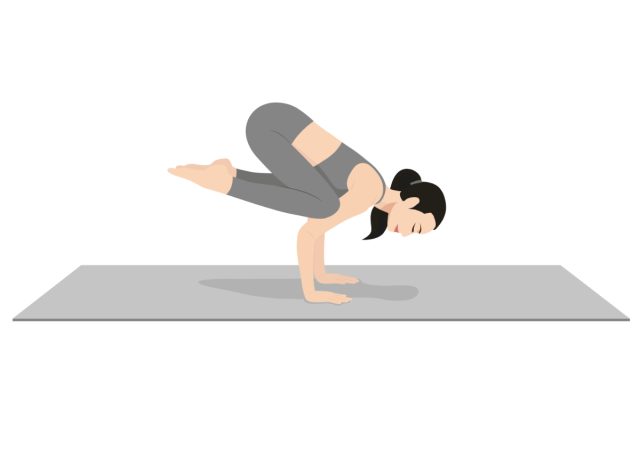
“While crow is an arm balance, and can take some practice to achieve, it is amazing for your arms,” Forte explains. “Most arm balance poses require you to hold the full weight of your body with your arms—hence the name, with the help of your core and some other key muscle groups.”
From a downward dog position, walk your feet up to your hands. Put a yoga block about a foot in front of your body if you’re concerned about your face coming into contact with the floor. Place your hands shoulder-width apart on the mat. Bend both elbows and shift as much of your body weight as you can into your hands. Bring your knees just below your armpits but over your elbows.
“Think of your upper arms as a shelf for your knees,” Forte instructs. “Begin to lift your feet off the floor, or if this is your first time trying crow, start with one foot at a time, and then the other, until you can lift both at once. Continue to shift forward —this is key! Lower your forehead to the block in front of you, or keep your gaze towards the front of your mat. Squeeze your inner things into your arm bones, and lift your hips up while hugging your core in.”
Work your way up to holding this pose for five to eight breaths.
To come out of crow pose, lower your feet and step back to assume a high plank or downward dog.
Frequently Asked Questions (FAQs)
What are the benefits of yoga for lean arms?
Yoga offers numerous benefits for enhancing arm strength and toning muscles, resulting in leaner arms. Some benefits include improved muscle tone, increased flexibility, and better posture. Yoga also helps in reducing stress levels and promoting overall well-being.
How often should I practice these yoga exercises for lean arms?
For best results, aim to practice these yoga exercises for lean arms at least 3-4 times a week. Consistency is key in seeing improvements in arm strength and muscle definition. However, it’s essential to listen to your body and rest when needed to prevent overexertion.
Do I need any special equipment for these yoga exercises?
No, you do not need any special equipment for these yoga exercises for lean arms. Most of the poses can be done using only a yoga mat and maybe a yoga block for added support if needed. It’s important to wear comfortable clothing that allows for easy movement during the practice.
Can beginners perform these yoga exercises for lean arms?
Yes, these yoga exercises for lean arms are beginner-friendly and suitable for all levels. The instructor has curated a list of poses that are accessible to beginners while still being effective in toning and strengthening the arms. Remember to start at your own pace and gradually build up your practice.
How long does each yoga session for lean arms typically last?
The duration of each yoga session for lean arms can vary depending on your preference and availability. A typical session can range from 30 to 60 minutes, including warm-up and cooldown periods. Feel free to adjust the duration based on your schedule and comfort level.


